First of all, a small disclaimer.
Discobot is quite early in its development so expect things to break. And when they do please send me an email or post a comment on this blog so that the bugs can be fixed. Also windows users have to work a bit harder as discobot is untested there. It should however be trivial to convert the bashscripts into bat files, other than that everything is pretty cross platform.
And now on to the howto...
Start with getting your hands on the latest and greatest version of discobot. At the time of writing it's discobot-0.3 You also need to have ant, groovy and android 1.5 installed. Untar the tar.gz file and navigate to the discobot root. In there you will find a file called project.conf set the android-folder property to the absolute path to the android sdk folder, for example:
android-folder:/home/user/bin/android-sdk-linux_x86-1.5_r2Now enter the discobot folder with your favorite console. And run the command
/discobot$ ./merge.sh clean This command copies the groovy-sourcetree into the mixer folder then copies the discobot patches to the same folder. When the trees are merged groovy is compiled and a discobot.jar file is put into the dist directory.To create a discobot project, ie the actual android application, you need to run the mkProject script. This script takes 2 parameters one is -path which is used to determine where the project files should be put. Note that that the project files is put directly into this folder.
The other parameter is -name which specifies the application name and classpath. This parameter uses the format classpath.ApplicationName, make sure that the application name starts with a uppercase letter as it will be used as the name for a source file.
/discobot$ ./mkProject.sh -path ../classloadExample -name org.discobot.classloadExample.ClassloadExample
Put the following code into the file located at
src/org/discobot/classloadExample/ClassloadExample.groovy.
package org.discobot.classloadExample

import android.app.Activity
import android.os.Bundle
import android.widget.TextView
import groovy.lang.GroovyShell
import org.discobot.util.DiscobotClassLoader

public class ClassloadExample extends Activity{

    /** Called when the activity is first created. */
    @Override
    public void onCreate(Bundle savedInstanceState)
    {
        super.onCreate(savedInstanceState)

        //setup the shell and binding
        def binding = new Binding()
        binding.setVariable("number", 123)
        def shell = new GroovyShell(new DiscobotClassLoader(this), binding)

        //Ask the shell to compile and run a small script for us
        def newValue = shell.evaluate("return number * 10 + 4")

        //Finally, display our results
        def str = "The number went from ${binding.getVariable("number")} to ${newValue}"
        def tv = new TextView(this)
        tv.setText(str)
        this.setContentView(tv)
    }
}
Save the file and run ant from the project root (remember to tell ant to include discobot.jar).
/classloadExample$ ant -lib libs/discobot.jar
Now install the generated package on your emulator as usual. Make sure the emulator is started before installing your apk.
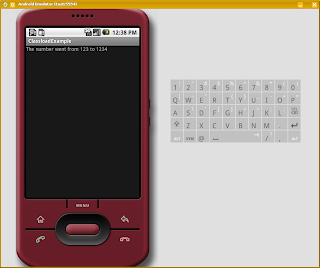
/classloadExample$ adb install bin/ClassloadExample-debug.apkYour program should now slowly be installed (discobot is huge!) on your device and a icon for it should be pop up among the other applications eventually. When you run the program there will be a period of about 15 seconds when the screen only shows the application name, this is due to the rather long boot time of groovy. But once everything is loaded the application should display the text "The number went from 123 to 1234".